Wave Maker Learning Portal
How to Install
This guide works only for the supported versions (2020.3.48f1 until 2023.2.16f1).
First of all, before installing WaveMaker, it is recommended to install the required packages to avoid compilation errors.
WaveMaker requires 3 packages to be installed manually in your project. You will see warnings on the components if any package is missing:
- Mathematics (1.2.6 or higher)
- Collections (1.4.0 or higher)
- Burst (1.6.6 or higher)
If you don't know how to install packages or have problems finding them:
- Go to Window -> Package Manager.
- Click the top dropdown and select "In Project".
- If you have a "PackageManager UI" package in the list, select it and check if there is an update for it.
- If there is an update and there are compilation errors due to WaveMaker, you will have to delete WaveMaker folder before updating it.
- Update it. Then reopen the Package Manager.
- Click the top dropdown and select "Unity Registry". That will display all packages available online.
- Find and install all the packages, preferably on the given list order, in a version higher or equal than the given one.
- If you want to install thes specific versions in the list and not the current ones, due to any error:
- Click the + dropdown on top.
- If you have "Add package by name", add each one by putting the version directly. If you have a newer version it will downgrade it.
- Otherwise, use "Add package from git url":
- If you need the Mathematics package, write: com.unity.mathematics and hit enter. Wait until the package appears in the list.
- If you need the Burst package, write: com.unity.burst and hit enter. Wait until the package appears in the list.
- If you need the Collections package, write: com.unity.collections and hit enter. Wait until the package appears in the list.
After installing the required package versions, download and install WaveMaker into your project. Use the manual page to learn how to download and install this asset from the Asset Store.
To check if everything is working right, open the Quickquide in pdf included in the main folder and follow the guide, or open one of the many Sample Scenes included and hit play.
Common Problem Solver - F.A.Q
WaveMaker requires some packages to be installed. To fix them, please visit the How to Install guide
v2 WaveMaker lies inside an assembly called WaveMaker. In that file the versions of the required packages are detected. This error arises just after importing the package, and seems like it can't detect the packages in some files and doesn't create the correct Visual Studio files. Delete .vs folder, and visual studio files (.csproj and .sln) in your project, and open the code again. It will regenerate the files. If it still doesn't work, you will have to clean up the Unity cache (delete Library folder, and Temp files) in the project folder and reopen the project. If it still persists, please contact me.
How do I create a liquid surface or an object to interact with it?
Use the quickstart pdf file included with the asset, or visit the tutorial section
What is that Descriptor file needed to initialize a WaveMaker Surface? How do I create it?
Visit the descriptor section to read about this file.
My interactor does not affect the surface!
Check if any of these is false:
- Are you on play mode?
- Are both on the same layer?
- Does the object that you want to use as an interactor have a WaveMaker Interactor component?
- Does the interactor have a collider component attached?
- Is the collider a NON-TRIGGER? The surface is a trigger, and two triggers don't interact with each other. Disable Is Trigger.
- Is the surface interaction mode set to Velocity based? In that case, if you are moving the interactor by setting the position directly or moving it by hand you have to activate IsKinematic in the RigidBody component.
- Activate the Show Detailed Log Messages checkbox in the Surface settings to see in the console says something when entering the surface with the interactor.
- If it still doesn't affect the surface, create a default interactor (right click in hierarchy view, 3d Object, WaveMaker...) and start from there.
- Contact support!
In Occupancy mode with buoyancy enabled my objects fall anyway
WaveMaker applies forces to objects with rigidbodies the same way the Unity physics engine works.
- The density of the water is generally 1. Keep it around that value.
- Check that the Rigidbody "Use Gravity" component is enabled.
- Check that the Rigidbody "Is Kinematic" component is disabled.
- Check that the Rigidbody "Drag" parameter is not too high. It prevents objects from moving or rotating
- Set the mass of your object in the RigidBody component to a logical value in kg or lbs.
- To test, set the mass to a very small value, like 0.01. The object should be lifted completely.
- Show the wireframe in the scene view, and check that the grid size is smaller than the collider size. Otherwise, increase resolution or increase the collider size.
- If the object still falls, the surface and the object are probably too big. Remember that in general, 1m is 1 unity unit. Check the grid and try to make it realistic.
- Contact suppport if still having problems!
It looks like some floating interactors fly above the surface.
The objects are virtually bigger to smooth out the interaction with the surface. This happens when your interactor is not too heavy. To avoid this, just increase the mass of the object's rigid body.
Some floating interactors never seem to stop rotating and moving or are unstable
Forces are not continuous but discrete, it means they are applied on the surface grid and generate unrealistic movements in some colliders. Try these solutions:
- Increase the mass of your rigidbody. Very light objects tend to be very unstable! Specially long and thin rigidbodies.
- "Buoyancy damping" should never be 0. But the value depends on the scale, size and resolution of your surface. Try starting at 0.002 and going up. A value higher than 0.5 is not usually recommended.
- If you can't make the floating object stable with any damping value, the mass is probably too low. Increase the mass of that rigidbody.
- For a specific rigidbody, increase "Angular Drag". That will make the object less prone to turning around if the shape is not stable.
- Combine colliders in the same rigidbody (can be overlapped) to make it stay in one position, for example, adding a sphere on the bottom on a ship to make it stay straight and tumble less.
This is a typical problem on any simulation. Some parameters will make the simulation unstable creating weird and increasing errors in play mode.
If you need higher resolution, you will have to keep your propagation speed low to avoid the warning. The problem with this is that waves will move very slowly. To fix this, set subtepping to 2 or maybe 3 maximum. This will allow to increase the propagation speed to the look you like.
But be warned: This will make the simulation take more processing time. Consider reducing resolution and try to keep substepping to 1.
Velocity based interaction compares relative velocities between the surface and the interactors. You can use the settings in the Interactor component of your object to enable velocity smoothing and showing it in the scene view on play mode to check if you like it.
Why WaveMaker doesn't use Compute Shaders to create the mesh without limits and a fast simulation?
This is a very common question. There are other assets in the Asset Store that do this, but lack some of the features WaveMaker has.
Using Unity meshes has the limitation of 56k triangles (that means for example 256x256 resolution in a square surface). Compute shaders would allow WaveMaker to have bigger and faster meshes generated inside the GPU.
Why not use the GPU? The reason for this is simple, for now: The Occupancy interaction mode that allows Buoyancy is a two-way coupling system: the surface affects the interactors, which are Unity rigidbodies, and colliders can affect the surface at the same time.
In order to affect colliders outside the GPU, interaction data should be extracted from it, which is a very slow (at least in my experience) and would absolutely destroy efficiency. In Compute Shaders all should be done inside the GPU, absolutely everything.
Since we use Colliders and WaveMaker doesn't implement a whole physics engine inside the GPU, which would go out of the scope of this asset, we can't really use compute shaders.
There are plans to enable Compute in the Velocity interaction mode, (no buoyancy) which is a one-way coupling, into Compute Shaders, so stay tuned!
The Surface
A surface is a game object with a WaveMaker Surface component and it shows a mesh and simulates it. The mesh and all needed components are automatically created and the mesh is updated each frame.
Create a surface fast using "3D Object -> WaveMaker -> (choose simulation type) -> Surface" in the GameObject menu or right clicking on the Hierarchy view.
Rules
- The surface mesh is created automatically as a rectangular grid using the resolution values. You cannot use your own mesh.
- Size and resolution of the mesh are independent, you can create a huge mesh with very low resolution or viceversa.
- The mesh resolution cannot surpass 56k vertices. That is 256x256 for a square mesh or a combination to generate the same amount of vertices.
- You cannot combine different surfaces right now, so you will have to be creative to achieve the shapes you want by using Fixed cells and transparent materials to hide parts if needed.
- A Mesh Renderer with any material and shader can be used with it to change the look and hide parts of it.
Avoid these
- Not choosing the most optimized values on "efficiency" sensible parameters (listed below). It will be very CPU consuming.
- Making the grid size of the mesh (visible via "Wireframe" view in the scene view) bigger than the interactors.
- In Occupancy Interaction Mode, disabling the "Parameter warning" checkbox while testing the surface.
The Interactor
The interactors are game objects with a WaveMaker Interactor component. They can interact with the surface to make it move. They can also be moved by the surface in certain cases.
Create a basic sphere / box / capsule interactor using "3D Object -> WaveMaker -> (choose simulation type) -> Interactor" in the GameObject menu or right clicking on the Hierarchy view.
When using Velocity based interaction, if your interactor moves very inconsistently (trembling, violent movement), you can use the velocity parameters to smooth out the velocity and see how it looks.
Rules
- An interactor component must have a collider attached to it.
- The attached collider should have a rigidbody next to it or up in the hierarchy.
- The collider cannot be a Mesh Collider.
- The attached collider can be in another game object or the same.
- The collider cannot be a trigger.
- Several interactors can be attached to the same GameObject.
- If using buoyancy (floating forces) on the surface, you can attach several interactors inside the same rigidbody group, and even overlap them. Volume occupancy will be correct.
Avoid these
These will make simulation look wrong.
- Attach the same collider to different interactors.
- Overlap interactors that don't share the same rigidbody while using buoyancy (floating forces).
The Descriptor File
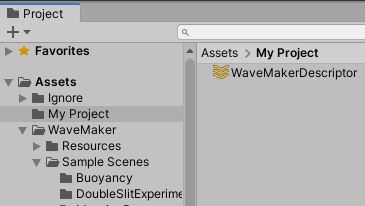
As soon as you create a WaveMaker Surface component, you will be asked to attach a Descriptor file. This scriptable object file is stored in your project and can be created in the Project View via the right click Create menu.
Descriptors store the resolution as well as the cell's properties. They can be shared between surfaces.
As soon as you attach the file, the mesh will be created and the parameters will be available. When modified, via the Inspector of the Descriptor or via the Wave Maker Surface component, all Surfaces using that Descriptor will be updated.
The Local Mesh Size
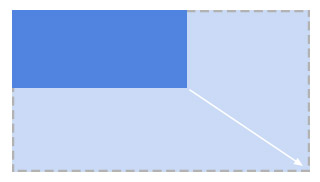
The size of the Surface is set via these values in the Surface component. It is the amount of Unity units it occupies from the object's pivot. If you use the transform scale to make the plane bigger instead, the simulation will also be scaled accordingly.
Wave Simulation Parameters
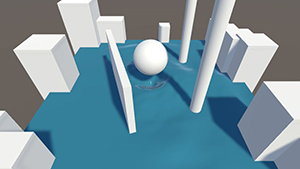
These parameters affect the simulation of the water even when there are no interactors touching it or which interaction type is selected
Substeps
By default set it always to 1. Increase it ONLY if you see a warning or the fluid is unstable. This happens when the resolution is too high or the propagation speed for that resolution is too high. A warning is shown in the surface component. Reduce resolution, reduce propagation speed or increase the value until the warning dissapears. Every FixedUpdate() the fluid simulation will be executed this number of times, so try to keep this value low!.
Affects Efficiency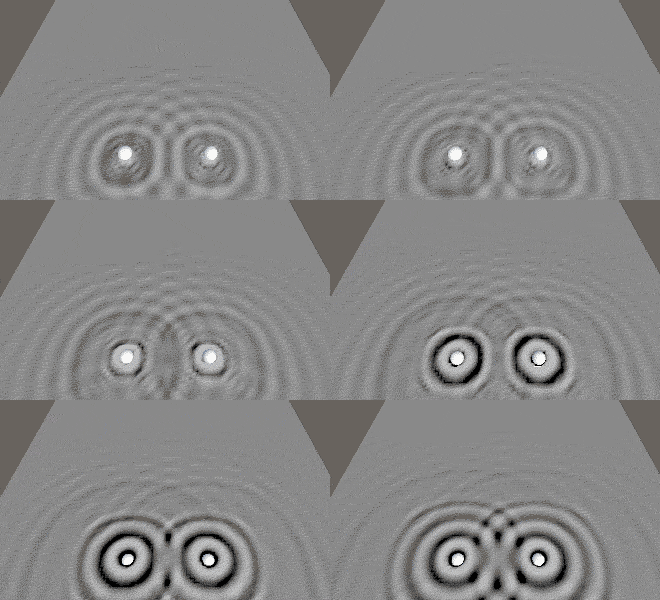
Propagation Speed
The speed of the waves. A warning will appear if the value is too high for the current resolution. For very high resolutions it is not possible to set a big speed value. If you need more and you can't reduce resolution, incresase the substeps by using the Substep parameter.
Affects stability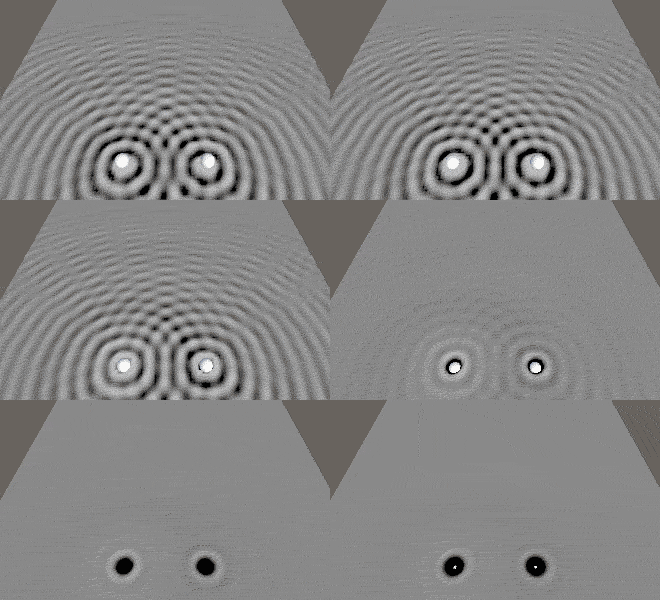
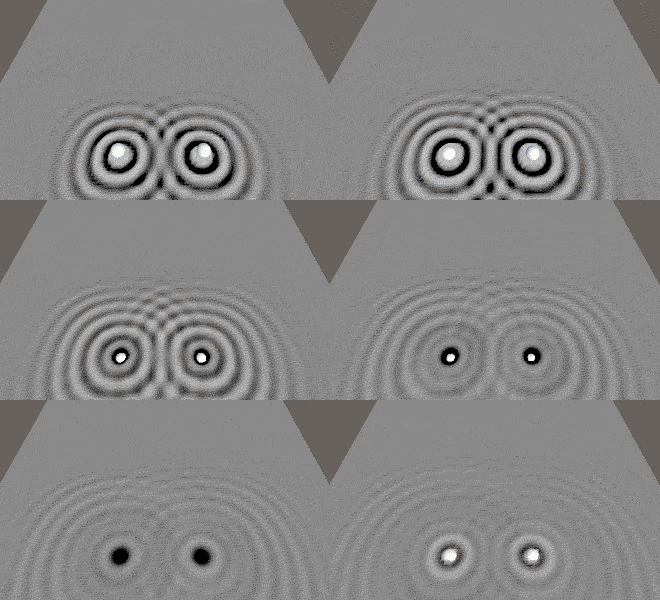
Damping
How fast waves dissapear in the surface. This will make your surface look creamy or like mercury. A value of 0 will never allow the surface to get asleep. A very extreme value could cause inestability, but in very excepcional cases.
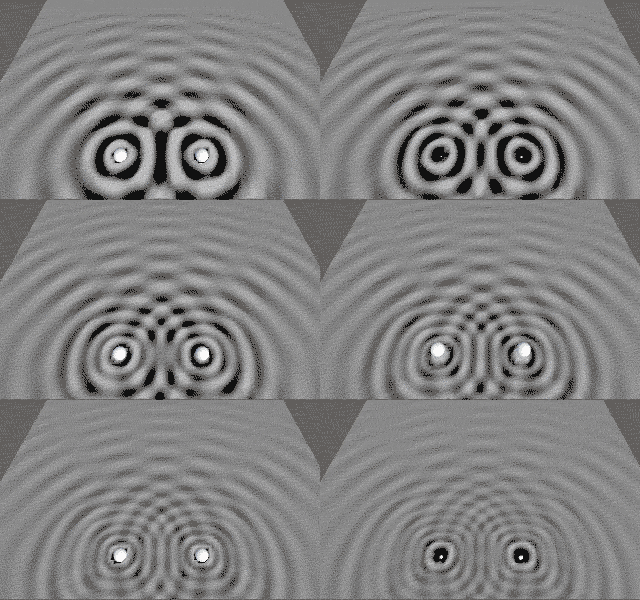
Wave Smoothness
To reduce mesh noise and spikes in the surface if you don't like how it looks, you can increase resolution or use this parameter (as well as shaders!). In general you need a very high value to see the effect.
Speed Tweak
This parameter generates unrealistic fluid effects and should not be used as a substitute to propagation speed. This will let you create slow-down and speed-up effects.
Interaction Types
This important choice changes the way interactors change the surface. The choice affects tremendously the efficiency of your scene and memory usage, so be sure to understand both methods!
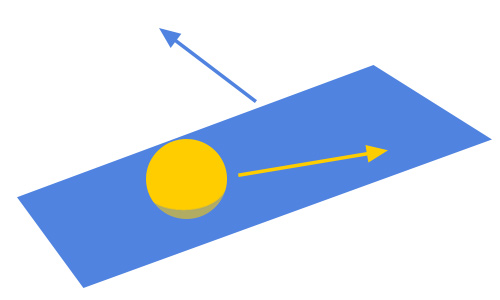
Velocity Based
Available from v1, this method detects interactors touching a very thin layer around the plane and compares relative velocities between the surface and the interactors in order to generate the waves.
This method is the fastest one of all, and its efficiency has been improved since v1 tremendously. Depending on the resolution of your surface (via Descriptor file) and a good choice of parameters to allow it to get asleep, you will be able to add many of them in the same scene.
When should I use it? If you just need water simulating or you want to add many of these in your scene. It allows for all sorts of orientations and positions inside any hierarchy. You will not have advanced features like buoyancy, drifting and others. This will suffice for most of the cases.
Occupancy Based
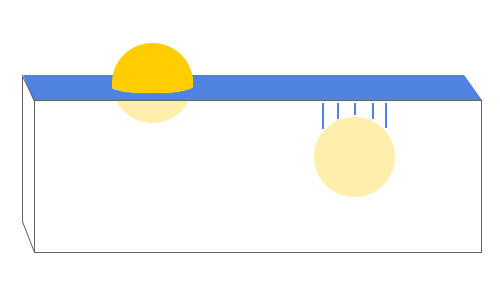
New in v2, this new method takes into account a box of space underneath the surface that detects interactors and calculates how much volume they occupy.
Since the occupancy is calculated, apart from the waves generated by the objects, we can use that to generate a bunch of advanced effects like floating forces (buoyancy) and drifting forces (horizontal floating forces) and much more that will come in future versions.
When should I use it? In general, horizontal surfaces where you need the advanced features like buoyancy or drifting. Be aware that they get asleep less often if objects are floating on them. Otherwise, always use the Velocity mode instead, which runs a lot faster and consumes much less memory.
Velocity Based Interaction Mode
Horizontal and Vertical Push Scale
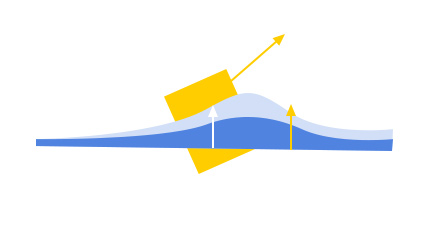
There is no default value for these. Play around with values. Since this effect is based on a fake physics effect, you can use these to scale the size of waves generated by horizontal movement and vertical movement relative to the surface. Set to 0 to remove any of them.
Interactor Maximum Speed
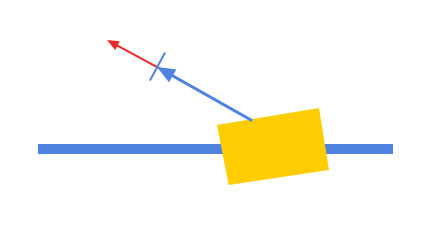
Since this method compares relative velocities between surface and interactors, huge waves can be generated due to very high speeds. To avoid huge waves, set to a speed in units per second that cannot be exceded.
Interactor Minimum Speed
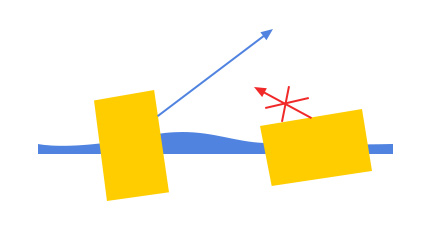
Since this method compares relative velocities, this will ignore any interactor that moves relative to the surface at this given speed in units per second. Useful to ignore tiny differences and keep the surface asleep.
Occupancy Based Interaction Mode
Depth
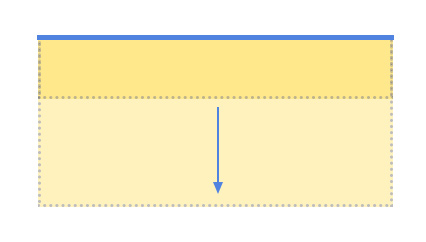
How deep the volume is. A collider is created in play mode going as deep in Unity units as selected. To improve numerical precision keep it as small as possible, but set the size so any interactor touches the bottom. If objects leave or enter the box through the bottom, waves will be generated on top.
Simulate Surface
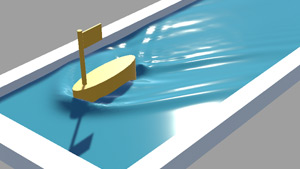
If disabled, the surface will not be modified by interactors and will stay flat. This improves efficency, and can be used in cases where you only want buoyancy. Disabling buoyancy too will make no sense, in that case, disable the whole component.
Affects Efficiency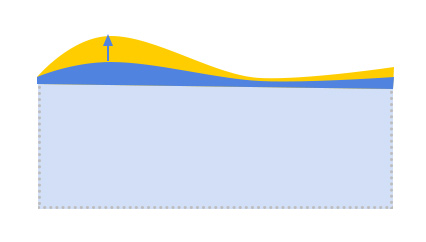
Simulation Scale
Waves are generated more realistically with this interaction method, but you can use this parameter if you want smaller waves (less than 1) or bigger waves (more than 1). Keep the value at 1 by default.
Max Detected Interactors
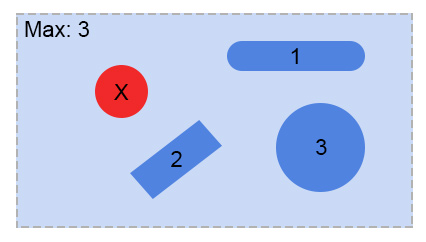
Set this to what you calculate will be the maximum number of interactors touching this surface at the same time. The smallest, the fastest the simulation and the less memory occupancy. If set wrong, some will be ignored and simulation / occupancy calculation could have unexpected outcomes. An error is output if the "Warning log" is enabled.
Affects Efficiency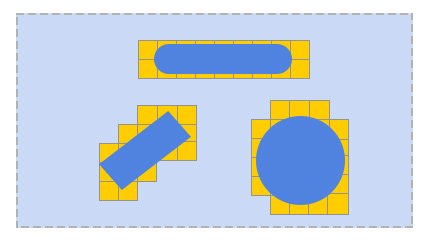
Max Cells per Interactor
Each interactor inside the area underneath the surface will have a number of cells assigned in the X-Z plane. If the value is too low, noise will happen on the surface and objects will not fully float. If the "Warning log" is enabled, you will see warnings whenever this happens. This value has to be the smallest you can to optimize the computations, so use the log to test your bigger interactors.
Affects Efficiency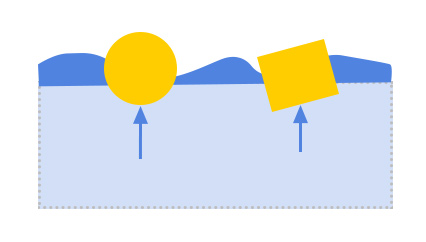
Buoyancy
Using the rigidBody mass, the density of the surface liquid, forces will push the object upwards until it is stable. Otherwise objects using gravity will pass through it.
Affects Efficiency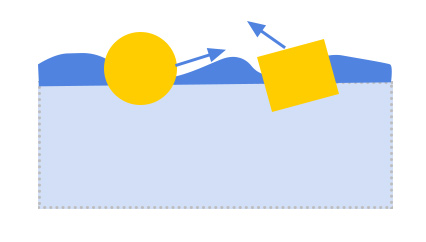
Drifting
Apart from vertical forces, other forces will be generated by the waves touching the interactors, moving them around the surface horizontally.
Affects Efficiency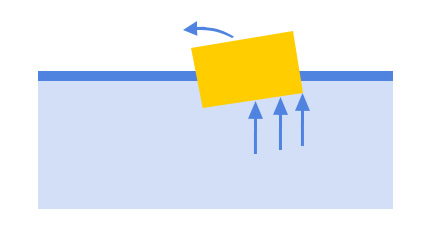
Damping (0-1)
Used to smooth out the buoyant forces to avoid non-stoppable movements that occur if set to 0. Values should be low, (start with 0.002 and up) you should find the one that makes your current size/resolution setting stable. If you can't, probably the mass of the object is too low. To stabilize individual rigidbodies use the Drag parameter on the RBs instead.

Density
Set to 1 by default, which is the density of water scaled in Unity units. You must combine it with wave simulation properties to make it look realistic. Find the values online (Water is 1, Oil is 0.92, Mercury is 13.60, etc). High density fluids will make interactors float a lot, lower values will not have that strength to rise objects. For real mass and density values, use 1000 instead of 1, and real mass values.
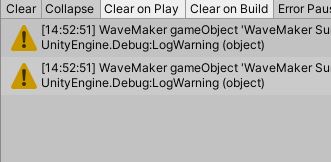
Show Setting Warning Logs
Keep this log enabled while developing your project to ensure your settings are correct in Occupancy Mode. It will guide you when objets detected are too big than the number of cells you set or more than the allowed amount of interactors are detected, etc.
Affects EfficiencyTutorials
Live Demos
Unity in WebGL doesn't support multithreaded code. These live demos will execute slower depending on your computer but at least you can play with them online.
© 2024 Lidia Martinez Prado - http://www.lidia-martinez.com
